A Complete Guide to Drywall Finishing Levels
Oct 02, 2021
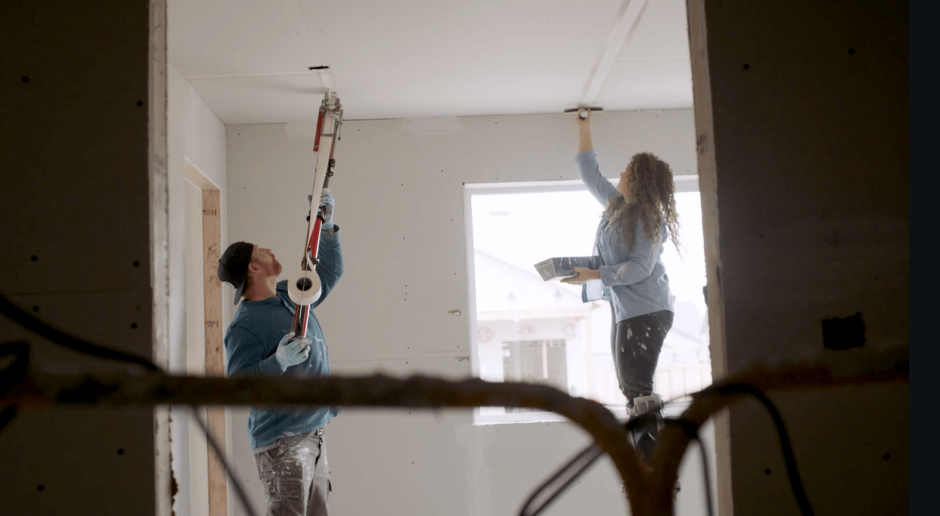
Drywall finishing is the final step in the drywall process. Once drywall sheets are hung and installed, this final step entails taping and mudding so the walls are seamless, firm, and ready for paint.
There are five different drywall finishing levels, each with its own group of standards set by the five trades for ceiling, wall, and drywall installation systems—the Association of the Wall and Ceiling Industry (AWCI), Ceiling & Interior Systems Construction Association (CISCA), Drywall Finishing Council (DWFC), Gypsum Association (GA), and Painting and Decorating Contractors of America (PDCA). All drywall finishing projects require the same basic steps.
What is drywall finishing?
Drywall finishing is the process of mudding, taping, and coating drywall to fortify walls and prepare them for paint. Here’s an overview of how it works:
- Pre-fill any joints or gaps in the drywall with a thin coat of hot mud. This is a powdery joint compound mixed with water before application. Pre-filling ensures all joints, screws, and uneven surfaces are smoothed and covered; it may also hold screws in place.
- Tape the mud. This is the process by which drywall tape— either mesh or paper tape—covers spots where two drywall sheets meet, like flats, corners, or butts (where two non-tapered sheets of drywall meet). Taping covers separate drywall panels and smooths the wall surface. It also reinforces exposed areas such as corners and helps them hold their shape. To begin taping, apply taping mud along the joint, then place and press drywall tape over it. Wipe away excess mud.
- Coat the tape with a layer of topping compound—a powdery mud mixed with water—once the taping mud has dried. Coating is the final step in a basic drywall finish, and depending on the finishing level, gets applied with boxes or handheld knives.
Drywall finishing levels
Drywall finishing is designated by levels—industry-wide standards that guarantee consistency throughout every project.
There are five drywall finishing levels, each progressing in detail and number of coats, starting with Level 1 as a preliminary finish, and ending with Level 5 as a highly polished, carefully layered finish. Here’s a closer look at each one.
Level 1
Level 1 drywall finish, also known as a fire tape, is typically used in garages, storage rooms, mechanical rooms, and any purely functional area that doesn’t need to be decorative. The standard for a Level 1 requires all flats, butts, and angles to be taped. Corner bead—a firm application that fits onto corners to make them crisp—is installed, and screws are coated once with coating mud.
Level 2
Level 2 drywall finish, known as a top coat, requires flats, butts, angles, screws to be coated once with coating mud. Level 2 is often found in closets and areas covered with shelving, which can be painted to hide coating marks.
Level 3
Level 3 drywall finish, also known as a skim coat, requires all flats, butts, angles, and screws to be coated twice. Angles are boxed, meaning they’re smoothed with a wheeled box tool filled with mud, and the corner bead is coated twice. If you’re texturing your drywall— whether it’s orange peel, popcorn, or skip trowel—a Level 3 finish should suffice. Because Level 3 is still somewhat rough, however, it isn’t ideal for well-lit spaces in homes that require smooth walls. Level 3 is mostly used for storage spaces or areas with textured walls.
Level 4
Level 4 drywall finish, also considered a “smooth finish,” requires everything—butts, angles, flatts, screws and corner bead—to be coated three times, with all angles boxed. At this point, there should be nothing shallow or hollow on the drywall sheet, and no box or tool marks of any kind. Most home interiors are at a Level 4 finish, which is sufficient for installing wallpaper.
Level 5
Level 5 drywall finish is ideal for walls with dark colors or high-gloss sheen, as it completely covers the drywall in coating mud, ensuring the paint appears even. Level 5 can also call attention to a wall, as when displaying artwork. To achieve a Level 5 finish, a very thin layer of coating mud is applied over all the Level 4 finishes to make everything appear seamless. Everything on the drywall sheet is on the same texture plane, smooth, and completely covered.
Drywall finishing materials and equipment
Drywall finishing requires several types of materials and equipment, which vary by structure, project, and drywall finishing level. Even the most basic drywall finish, however, requires the essentials outlined below.
Joint compound
There are several different types of joint compounds (powder or premixed) used in drywall for mudding purposes such as pre-filling, taping, and coating.
- Powdered mud. Also known as hot mud, powdered mud is a chemical compound that dries quickly when mixed with water after 20 to 60 minutes. This strong, sturdy mud expands as it dries, which is especially handy for pre-filling and smoothing over imperfections before taping. Hot mud is used on most drywall projects, most commonly in the pre-filling stages.
- Premixed mud. Made from gypsum and other materials, premixed mud has already been mixed with water and takes longer to dry than hot mud. It’s typically used for taping, coating and texturing, with varying ingredients, density, and drying times. Common types include all-purpose, lightweight all-purpose, and topping mud.
Paper tape
There are two main types of tape: paper and mesh. Mesh tape is sticky and doesn’t require taping mud for application; paper tape does. Mesh tape is typically used to patch up small areas on uneven boards. Paper tape is more commonly used for general taping needs since it’s sturdy and holds its shape well. Paper tape comes pre-creased for corners, or you can crease as you work.
Taping knives
These typically rounded blades allow tape to be sealed to the wall and scrape off excess compound. Some square taping knives are useful for getting into corners and angles. Most taping knives are around six inches, for a precise finish and control of the blade.
Whichever finish you decide on, be sure to communicate clearly with your drywall contractor. If you’re finishing the drywall yourself, make sure you have all the necessary tools and equipment to create a professional, polished look, no matter the level of finish.
MT Copeland offers video-based online classes that give you a foundation in construction fundamentals with real-world applications, like drywall finishing. Classes include professionally produced videos taught by practicing craftspeople, and supplementary downloads like quizzes, blueprints, and other materials to help you master the skills.

