When constructing a building, Nielsen Crist, a professional carpenter based in Bedminster, New Jersey, says the most important thing to ask is, “Will it fall down?” The second most important question is, “Will water get into it?”
It is especially important to waterproof and seal open structures like windows. Not only does it keep external elements like water out, but it also prevents air-conditioned or heated air from escaping. Properly waterproofing windows can also make buildings more comfortable and even extend their longevity.
What equipment do you need for pre-installation waterproofing?
- Flashing tape
- Weather-resistant barrier (Tyvek or liquid flashing)
- Staple gun
- Utility knife
How to waterproof windows before installation
Waterproofing your window is a straightforward and important process you’ll want to get right—skipping over just one of these steps can make the window vulnerable to leaks. The first waterproofing phase begins before the window is installed.
- Apply a weather-resistant barrier over the sheathing. Weather-resistant barriers (WRBs) wrap around buildings that are under construction and prevent water from entering. Some are bonded directly to the sheathing, like liquid flashing, and others, like Tyvek, are applied after the sheathing is installed. If you are using Tyvek, you will need a utility knife and staple gun to shape and attach it to the sheathing. Liquid flashing is an adhesive that’s applied like tape–you only need a utility knife to cut it.
- Cut Tyvek away to reveal the window’s rough opening. The rough opening is an empty window frame, which the WRB must be shaped around so the framing can be waterproofed before installation. (Liquid flashing doesn’t need to be cut, as it’s shaped around the rough opening during installation.)
- Apply flashing tape around all sides of the rough opening. Make sure this tape reaches inside the window framing toward the interior and outside around the window’s perimeter. Cut the flashing tape with a utility knife to shape it around the window’s sides, header, and footer.
- Apply flashing tape to cut ends of the WRB if using Tyvek. This seals the WRB to the sheathing, ensuring the WRB cuts don’t let in water.
What equipment do you need for post-installation waterproofing?
- Wood shims
- Flashing tape or liquid flashing
- Utility knife
- Foam backer rod
- Sealant
- Caulk gun
- Caulk finisher tool
How to waterproof windows post-installation
- Insert wood shims between the window and wall on the window’s interior. Place shims on all sides of the window. (The number of shims depends on the window manufacturer’s specifications—some require three, others require four or more.) This ensures that if water gets inside, it won’t wick into the wood frame, potentially causing damage. Instead, water will be directed from the framing, into the flashing material.
- On the window’s exterior, apply flashing tape over the window flanges. Flanges are thin strips of material on all four sides of the window, where nails attach the window to the framing. Apply tape to the sides and top of the window, extending about 3 inches from each side. Do not apply flashing tape to the bottom of the window; if water gets in and the bottom is taped, it will be trapped. Leaving the bottom tapeless provides an exit.
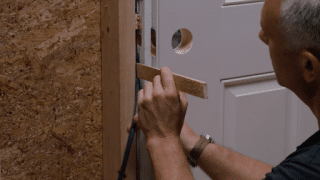
- Remove the shims and insert a backer rod to seal the interior. Line the backer rod into the joint between the window and framing and use a wood shim to press the rod firmly into the space. Using a backer rod creates a stronger joint and reduces how much caulk you’ll need later on to seal the joint.
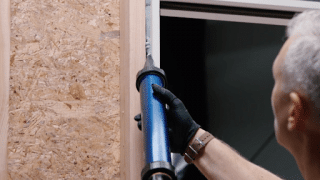
- Load a caulking gun and apply sealant along the joints. Fill all four sides of the window, fully covering the backer rod. Thoroughly seal the window’s bottom to block any water. Window bottoms are the most prone to leaks since water moves down.
- Run a caulk finisher tool over the lines of sealant. It’s important the sealant is smooth and any excess is wiped away, so it dries uniformly and fills the joint completely.
MT Copeland offers video-based online classes that give you a foundation in construction fundamentals with real-world applications, like how to build a freestanding deck. Classes include professionally produced videos taught by practicing craftspeople, and supplementary downloads like quizzes, blueprints, and other materials to help you master the skills.


