Carpentry and woodworking are both age-old practices, and as a result, many techniques exist for joining two pieces of wood together. From simple lap joints and mechanical fasteners to advanced techniques for experienced artisans and DIYers, there are plenty to choose from. One such technique is the mortise and tenon joint, a joinery technique used in furniture building, cabinet making, and even heavy-duty timber frame construction. But, what is a mortise and tenon joint? Keep reading to find out.
What is a Mortise and Tenon Joint?
A mortise and tenon joint is a type of joint used to connect two mating pieces of wood. As the name suggests, this joint consists of two components: the mortise and the tenon.
- A mortise joint is a hole (usually square) dug, drilled, or carved out of a piece of wood. This hole can be shallow or deep (both considered “closed mortises”) or pass the whole way through the wood to the other side. It’s designed to receive a piece of wood (the tenon).
- The tenon is a protruding section of wood cut from a board or piece of wood. It can vary in shape and size, and the builder can carve it with chisels, cut it with saws, or use a combination of tools and techniques. The square cuts used to reduce the tenon to size and thickness are the “shoulders” and “cheeks.” The locations of the shoulder cuts determine the length of the tenon, while the locations of the cheek cuts determine the width and height of the tenon.
While the technique of cutting mortise and tenon joints is ancient, this joint is still widely used today. Cabinet makers use them for door construction, woodworkers use them to attach a variety of pieces, and timber framers use them in almost every joint they construct. The tools evolved a bit, with plunge routers and power saws taking the place of chisels and mallets, but the techniques are still the same.
Types of Mortise and Tenon Joints
With so many different tradespeople and craftspeople using this joinery technique, it stands to reason that there would be a few variations of the mortise and tenon joint. Here are some of the most common.
Standard mortise and tenon joints
With a standard mortise and tenon joint, the craftsperson cuts the mortise partially into a piece of wood and then cuts a simple, straight tenon with two or four shoulders. The tenon then fits inside the mortise.
This joint offers a lot of gluing surface, making it a favorite for many woodworkers. They can apply glue to the shoulders and the cheeks and fit the two pieces together. This results in strong joints that are resistant to racking, making them ideal for tables, chairs, and other similar applications.
Stub mortise and tenon joints
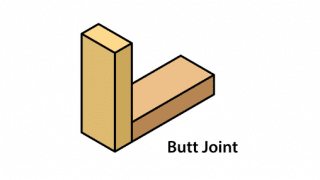
When a cabinet maker creates a frame and door panel, they cut long, shallow grooves known as dados down the middle of the rails and styles for the panel to slide into. While these grooves aren’t exactly mortises, the cabinet maker can cut short tenons that slide into these grooves, creating the look of a butt joint while providing more strength and glue area.
Due to their shallow mortises and short tenons, stub mortise and tenon joints aren’t very strong by themselves. The addition of a wood panel between them, as well as the joints at the other three corners of the door, offers plenty of strength for small doors, such as those on kitchen cabinets and bathroom vanities.
Haunched mortise and tenon
In order to make a frame and panel door a bit stronger, many craftspeople use haunched mortise and tenon joinery. In this joint, the craftsperson cuts the standard dado but then cuts a deeper mortise near the end of the style. They then cut a tenon to fit the mortise, as well as a stepped “haunch” to fit in the dado.
This design is much stronger than a typical stubbed joint as it has more glue surface and the haunch helps resist racking. It’s a great choice for full-size doors and cabinetry.
Through mortise and tenon joint
The through mortise and tenon joint is a favorite on larger, heavy-duty projects such as timber framing or even some furniture styles. With this joint, the mortise passes all the way through the piece of wood, allowing the tenon to slide in and stick out the other side.
In some cases, the craftsperson will drive pegs through the joint to hold the pieces together while still being able to disassemble the joint whenever necessary. In other cases, the end of the tenon can be wedged to lock the joint in place. Also, it’s possible to drive a peg or wedge through the end of the tenon, across the grain, to pin the board in place.
How to cut a mortise and tenon joint
There are many ways to cut a mortise and tenon joint, but this guide will explain one of the easiest ways to accomplish this joint with simple hand and power tools. Keep in mind that more advanced power and hand tools, practice, and a better understanding of wood grain will allow you to cut mortise and tenon joints with more accuracy and develop your preferred method.
Tools and materials needed for cutting a mortise and tenon joint:
- Two pieces of wood
- Combination square
- Pencil
- Bench vise
- Set of bench chisels
- Utility knife
- Hammer
- Power drill
- Hand saw
- Sandpaper
- Wood glue and pegs (pegs optional)
- Wood clamps
1. Layout the joint
Use the combination square to layout the size and location of the joint. The tenon’s thickness determines the size of the mortise, so you need to determine that first.
Generally speaking, a tenon should be ⅓ the thickness of the board. Divide the thickness of the board by three and then set the combination square to that measurement, marking the end of the board on the top, end, and bottom for cutting (this marks the cheeks).
If the board you’re mortising is the same thickness, use this measurement to mark the mortise. Then mark the tenon shoulders according to the desired depth of the mortise.
2. Cut the tenon
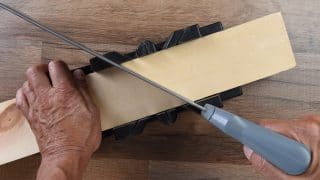
Clamp the board in a vice so you’re able to see the lines marking the cheeks. Cutting just to the outside of those marks, cut the cheeks with the handsaw. Be sure to stop at the shoulder marks.
With the cheeks cut, reposition the board in the vice so you can cut the shoulders. Use the chisels to fine-tune the cheeks to size.
3. Drill out the mortise
Find a drill bit that is slightly smaller than the width of the mortise and install it in a power drill. Holding the drill as plumb as possible, drill into the mortise in several places. Be sure not to drill outside the mortise location, or the tenon will have a sloppy fit.
4. Fine-tune the mortise with chisels
With the bulk of the mortise material removed with the drill, use the chisels to fine-tune the mortise hole. First, use a utility knife to score around the edges of the mortise to prevent splitting. Then, carefully align the chisel’s tip on the edges of the mortise and remove small bits of wood at a time by tapping the butt of the chisel lightly with a hammer (hand pressure may work, as well). Stop occasionally to clear shavings from the mortise.
5. Test fit the joint
As you’re tuning the mortise, stop frequently to test fit the joint. Use the pencil to mark anywhere that might be snug and then pare that area down with a chisel or sandpaper for a perfect fit. If this feels like a slow process, it’s because it is. Remove small amounts of wood at a time to make sure you get a tight fit.
6. Secure the joint
When the joint fits snuggly, it’s ready for fastening. Apply wood glue to the tenon’s shoulders and cheeks, as well as a bit inside the mortise. Slide the tenon into the mortise and lightly tap it until it’s fully seated. Clamp it in place
If you’d prefer not to use glue, you can secure the joint with pegs. First, remove the tenon from the joint and drill a hole through the mortise completely. Then, fit the tenon in the mortise and mark the peg locations on the tenon with the pencil before removing it again. Next, use a drill bit to drill through the tenon at the marks, but hold the drill bit just slightly to the shoulder side of the mark (1/16 of an inch is plenty). Finally, reinsert the tenon and drive the pegs through the joint with a hammer. This method is called “draw boring,” and it will pull the joint tighter while still allowing you to disassemble the joint if needed. To do so, simply tap the peg back out.
MT Copeland offers video-based online classes that give you a foundation in construction fundamentals with real-world applications, like building cabinets. Classes include professionally produced videos taught by practicing craftspeople, and supplementary downloads like quizzes, blueprints, and other materials to help you master the skills.


