Butt joints are all about simplicity. They’re fast and easy to make, and, with a bit of care and attention, they can be quite strong. But what is a butt joint, and how does it work? What do you need to know to utilize this simple joint in your projects? The following guide covers it all.
What is a butt joint?
A butt joint is a type of wood joint used to connect two pieces of wood to each other at a corner (typically 90 degrees). This wood joinery technique involves butting the end of one board up to the face of another board and driving nails or screws through them for strength. A bit of glue between the boards is also a wise idea.
Basic butt joints aren’t very strong on their own, and the board that butts up to the other utilizes its end grain. End grain soaks up glue quickly without bonding well, and it doesn’t hold onto fasteners like nails or screws very well. However, it’s possible to increase a butt joint’s strength by adding wooden gussets or metal brackets if necessary. Also, biscuit joints, dowels, pocket holes, or even lap joints can make a butt joint much stronger.
Where are butt joints used?
Butt joints are effective but aren’t very attractive. Unlike other joinery methods, they rely heavily on hardware like nails, screws, and brackets. However, butt joints are fast to make and can be strong at times. For instance, standard stick framing utilizes butt joints to connect studs to top and bottom plates. One joint by itself isn’t strong, but several over the course of 8 or 12 feet can be very strong and resilient.
You’ll also find butt joints in floor framing and decks, where floor joists meet with rim joists. In these applications, a metal bracket called a joist hanger and toenailing (nailing through the end of the joist at an angle and into the rim joist) will give the joint the strength it needs.
Butt joints are far less common in woodworking projects and furniture making, where craftspeople are more likely to use miter joints, mortise and tenon joints, box joints, and dovetail joints for their strength and appearance. With those other woodworking joints available, you aren’t likely to see a butt joint used for cabinet doors or picture frames.
How to make a butt joint
The butt joint is the most basic of woodworking joints, but there are a few things to know and understand about them. For this guide’s purpose, we’ll assume the joint needs slightly more precision than a traditional framing joint, but you can often make butt joints with much less effort.
Tools and materials for making a butt joint:
- Two pieces of wood
- Tape measure
- Pencil
- Miter saw, circular saw, table saw, or hand saw
- Wood glue
- Power drill and drill bits
- Hammer and nails, or screws
1. Mark the wood properly
Making a strong butt joint starts with marking the wood properly. Measure the desired length of each piece with the tape measure and use the pencil to make a small mark. Align the speed square with the mark and draw a straight line across the board. Draw an “X” on the waste side of the board.
2. Cut the wood to length
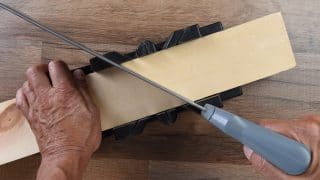
For a butt joint to have any chance of being strong, it needs to be cut squarely. The easiest way to cut a board to length squarely is to use a miter saw set to 90 degrees, but a circular saw, table saw, or hand saw will work, too. Cut the board at the cut line, keeping the blade on the waste side of the line and staying as square as possible.
3. Dry fit the boards and drill
Place the end of the board against the face of the other board at the location where the butt joint will be. Draw a reference mark across the edges of both boards for easier alignment. Using the power drill and a drill bit slightly smaller than the screws or nails you’re using, drill through the face of the one board and into the end of the other in two spots. Depending on the types of wood you might be using, this can prevent splitting.
4. Apply the glue
Apply glue to the end of the board that will butt against the other board. End grain soaks up a lot of glue, so don’t be afraid to go a little heavier than you might normally.
5. Butt the pieces of wood together
Reassemble the pieces of wood so the reference marks on each board align. A bit of glue will probably squeeze out at this point, but that’s okay. You can wipe it up with a wet rag.
6. Fasten the joint
The glue will help, but it’s probably not strong enough to hold this joint together on its own. Reinforce the butt joint by driving nails or screws through the predrilled holes. Wipe up any excess glue and allow the joint to dry. If you’d like to add more strength, you can install plywood gussets or angle brackets.
MT Copeland offers video-based online classes that give you a foundation in construction fundamentals with real-world applications, like introduction to cabinetry. Classes include professionally produced videos taught by practicing craftspeople, and supplementary downloads like quizzes, blueprints, and other materials to help you master the skills.


