There are plenty of ways to join two pieces of wood together. Some are very strong but complicated to cut, while others are very simple but lack strength. There is one particular joint that lands on common ground: The half-lap joint. It’s both easy to cut and provides lots of strength to your finished product.
What is a half-lap joint?
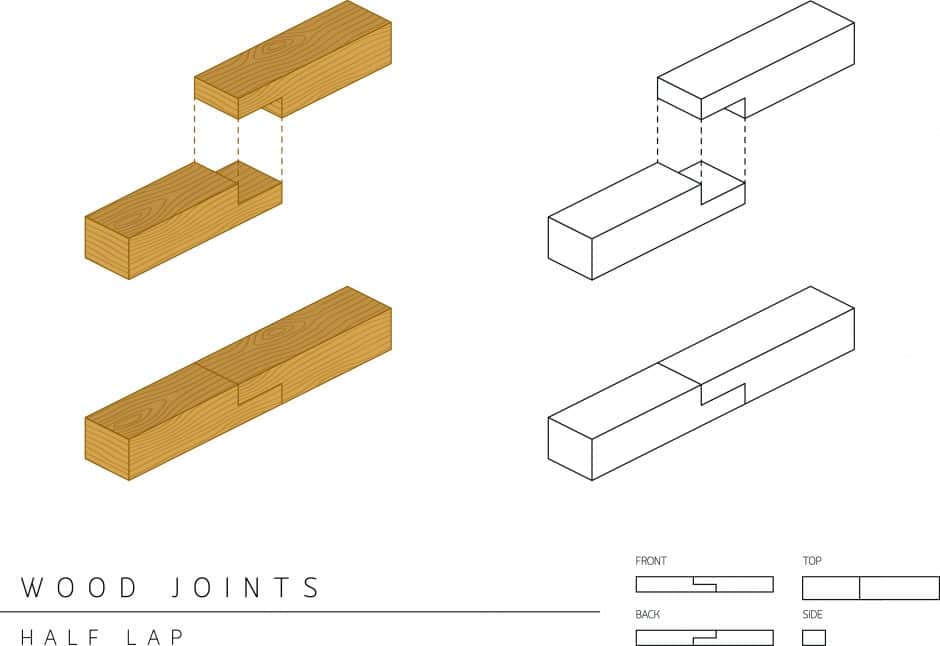
A half-lap joint is a carpentry and woodworking joint made between two pieces of wood. This joint involves removing half the thickness of both boards and then mating them together to create a thickness that is uniform with the rest of the boards. DIYers and carpenters can cut half-lap joints with a table saw, circular saw, router, radial arm saws, or even a hand saw. Half-lap joints are versatile, quick, and relatively easy to accomplish.
Half-lap joints are most common with construction materials like framing lumber and timbers. They’re effective and strong, yet crews can cut them efficiently with the tools on site. Half-lap joints are also common in cabinetry and woodworking as craftspeople can cut them for corner joints on doors and drawer fronts.
The half-lap joint gets its strength from the long grain on mating surfaces, whether it’s with glue or mechanical fasteners. When removing half the thickness to create a half-lap joint, a shoulder develops on each board. This shoulder provides some resistance to racking, or leaning to one side, and offers a bit of extra glue surface.
Half-lap joint vs. lap joint: What’s the difference?
Technically, the half-lap joint is a variant of the lap joint, but they’re quite different ways to join wood.
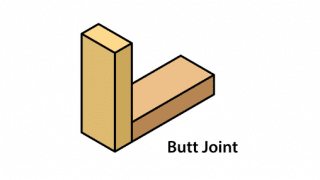
The standard lap joint involves stacking two pieces of lumber over each other at the joint, whether it be a corner joint, T-shaped joint, or straight joint. This creates a joint that’s double the thickness of the boards, making it rather clunky and unattractive. It’s most useful in framing, where crews can quickly construct rafter sets and add collar ties to strengthen them. They’re also common along the top plates of a construction project where intersecting walls join with the main structure. These joints require mechanical fasteners, but they’re the simplest and fastest of all joints to make.
Half-lap joints take longer to make, as the boards need to be cut to length, laid out, and then milled to half their thicknesses. That takes time, but the benefit is a stronger, more attractive joint with a uniform thickness.
How to make a half-lap joint
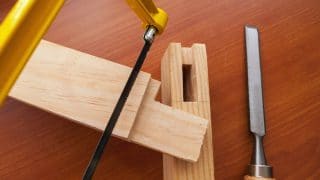
There are a lot of ways to cut a half-lap joint, the most common of which would be with a table saw and miter gauge or with a circular saw and chisel. We’ll highlight the latter in this guide, but the steps are similar for both tools.
Tools and materials required for making a half-lap joint:
- Two pieces of wood of equal dimensions
- Tape measure
- Pencil
- Speed square or combination square
- Circular saw
- Clamp (optional)
- Safety glasses
- Hammer
- Chisel
- Sandpaper or hand plane
Note: You can cut a half-lap joint with boards of varying dimensions, whether it be thickness or width, but it’s best to get a feel for the process first. You should first try this process on a few pieces of scrap wood that match your workpieces’ dimensions and adjust as needed before cutting your finished workpieces.
1. Layout the joint
Before you can cut the joint, you need to lay it out. First, measure the width of one of the boards. Then, place both boards side by side and measure in from the end by this distance (for example, 1x4s and 2x4s are 3 ½ inches wide, so you would measure in 3 ½ inches from the end of the board). Use the combination or speed square to draw a line across both boards at this distance. This mark indicates the shoulders.
Then, you need to make the end of the boards precisely at half the thickness of the board. For a 1×4, you’ll mark it at ⅜-inch. For a 2×4, you’ll make it at ¾-inch.
2. Set the cutting depth
With the circular saw unplugged, place it on the end of one of the boards. If you have a clamp, use it to clamp the saw’s base to the board. Flip the depth lock loose and adjust the saw’s depth of cut so the very furthest tooth from the saw’s base just kisses the mark indicating half the thickness of the board. Lock this depth in, and check it one last time for accuracy before unclamping the saw base.
3. Cut the shoulders
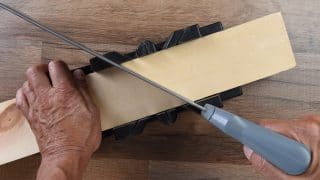
The first step to actually making a lap joint is cutting the shoulders. Put on a pair of safety glasses and line the outside edge of the saw blade with the very edge of the shoulder line. This cut must be on the waste side (the side you’ll be removing), so alignment is important. Hold the saw back from the board just slightly before starting it, and make a pass across the shoulder.
4. Cut several kerfs
Next, use the circular saw to cut several closely-spaced kerfs between the shoulder cut and the end of the board. The cuts should look similar to a comb, with the remaining wood being the teeth.
5. Remove the waste
Tap the slivers of wood with a hammer to break them loose. Then, use the chisel and hammer to cut the waste remaining between the kerfs, creating a smooth, flat surface. You can clean them up even more with a bit of sandpaper or a hand plane.
6. Repeat on the other board
Repeat this process with the other board. When you’re done, you should be able to overlap the two milled ends and create a perfectly flat, uniform joint. You can use wood glue, construction adhesive, screws, or even dowels to connect these pieces for a secure, solid joint.
MT Copeland offers video-based online classes that give you a foundation in construction fundamentals with real-world applications, like introduction to cabinetry. Classes include professionally produced videos taught by practicing craftspeople, and supplementary downloads like quizzes, blueprints, and other materials to help you master the skills.


