Many people are familiar with the miter joint since it is the most common joint around the house. Wall and door moldings, picture frames, and other similar features throughout a home utilize these joints, and they’re almost always on full display. Learn more about miter joints and how to build a miter joint yourself.
What is a miter joint?
A miter joint (sometimes spelled mitre) is a woodworking joint formed by cutting two boards in exactly opposing angles and butting them together to form a corner or another desired angles, In most cases, a miter joint is usually made up of two boards cut at opposing 45-degree angles, and when assembled, the two form a 90-degree corner.
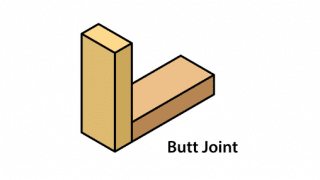
As a glue joint, miter joints aren’t incredibly strong, but they’re substantially stronger than a basic butt joint. This is because the miter cut exposes a bit of the long grain of each board, which allows for a significantly better glue area than the end grain in half a butt joint.
It’s possible to reinforce a miter joint as well. Nails and screws work, but by fitting the joint with biscuits, dowels, floating tongues, or pocket holes, the miter joint’s strength improves tremendously. And, because assembling a miter joint is notoriously tricky, these mechanical fasteners often allow the user to align the joint more efficiently and accurately.
How to use a miter joint
Miter joints are typically decorative in nature. They allow ornate, detailed moldings to wrap corners and continue without breaking up the pattern, which is why they’re primarily used where joints are visible.
The most common uses for miter joints are window and door moldings. Save for special moldings styles like craftsman or Arts and Crafts, most joints where the vertical and horizontal trim pieces meet are mitered. These moldings do not have any structural purpose and are therefore sufficient.
Miter joints are also common in picture frames, where they’re used almost exclusively. These joints allow the framer to continue the detail of a molding all the way around the picture, or to choose two pieces of stock with matching wood grain for a continuous look.
Other applications for miter joints might include where deck boards on the sides of a deck meet, where “breadboards” on the end of a table meet the side of the tabletop, or cabinet door corners. Each of these joints is typically reinforced with a mechanical fastener, biscuit, or spline.
What tools do you need to make a miter joint?
For a miter joint to look good and have the appropriate amount of surface area for gluing, the cut needs to be exact. Being off as much as 1 degree can cause a gap that not only looks bad but also won’t glue up well. And while it is possible to make these cuts off-hand with a hand saw, it takes years and years of experience. Luckily, there are tools that make the job easier.
- Speed square or combination square. First, when it comes to marking miters, a speed or combination square can be helpful, but it’s not necessary. In fact, unless you’re cutting a flat board, using one of these squares can cause mistakes. It’s difficult to mark a 45-degree angle on a piece of trim with a tapering thickness, so marks used are rarely accurate.
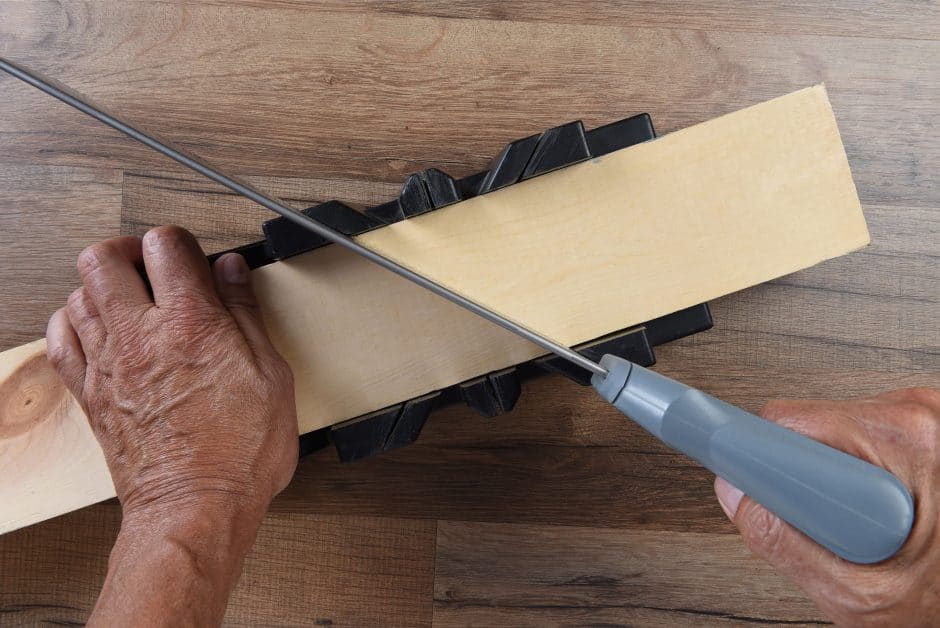
- Miter box. To cut miters by hand, you can use a miter box. A miter box will either have set grooves for the saw to ride in (one of which is 45-degrees) or angle adjustments to guide the saw. With a sharp backcut saw, you can cut a perfect miter, even if you’re new to these joints.
- Miter saw. For a faster, more efficient way to cut miters, use a miter saw. Like miter boxes, these saws have adjustable angles that lock in at 45 degrees, but the blade is powered by an electric motor that quickly slices through moldings and boards.
- Biscuit cutter. Once cut, the easiest way to assemble a miter joint is with a biscuit cutter. Since a biscuit cutter slices a groove into each board and you slide a biscuit between those grooves, the surface area for glue increases and the biscuit locks the pieces together as it swells.
- Clamps. Clamps can also be a big help. A right-angle clamp that holds the moldings or trim pieces together while the glue dries can create more accurate joints with less stress.
- Nail gun. Finally, it’s entirely possible (though not necessary) to nail a miter joint together. Simply assemble the joint and shoot a nail in from the outside of either board. Just be sure not to nail too close to the end of the board or the nails will punch through both sides or split the board. For temporary holds that rarely split wood and barely show, use a 23-gauge brad nailer during glue-up. Just allow the joint to dry before moving it.
How to make a miter joint
Miter joints (or mitre joints, as they might be called) are simple to make, but they need to be accurately cut and joined. The easiest method of making a miter joint is to use a miter saw, glue, and a biscuit jointer, which we’ll detail below. However, it’s possible to achieve similar results with a miter box and nails if you’re careful and exacting.
Tools and Materials:
- Two pieces of trim boards
- Pencil
- Miter saw
- Biscuit joiner and biscuits or a hammer and nails
- Wood glue
- Masking tape
1. Mark the pieces for cutting
It can be difficult to measure mitered boards accurately, so it’s often better to hold them in place against a window, door, or tabletop, and mark them. Using this method mark both boards on the inside of the joint and draw an “X” on the waste side.
2. Set the saw to the correct angle
The miter saw’s blade needs to be at the correct angle to pull off a perfect miter joint. For 90-degree joints, this means setting the saw to 45 degrees.
3. Cut the boards
Place a board on the miter saw. Before starting the miter saw, lower the blade to the workpiece so the blade is close to the pencil mark, but just slightly to the waste side. Lift the saw, turn it on, and lower the blade slowly until it starts removing wood. Carefully adjust the workplace until the edge of the blade meets the pencil mark perfectly. Cut the board and repeat on the other board.
4. Cut the biscuit slots
With the miter cuts made, use a biscuit cutter to cut slots at the end of each board. Use the largest biscuit setting that won’t cut through the face of the board.
Note: If you’re using a hammer and nails, skip this step.
5. Glue the joint
Squeeze some glue into each slot and on the face of the miter cuts. Insert the biscuit into the slots, align the miter, and assemble the joint. Stretch a piece of masking tape around the corner to hold the boards in place while the glue dries.
For a hammer and nails, squeeze a bit of glue on the face of the miter cuts and assemble the joint. Use a piece of masking tape stretched around the corner to hold the boards in place. Then, drive one nail through the edge of one board and into the other, and repeat the process on the other board. Allow it to dry.
MT Copeland offers video-based online classes that give you a foundation in construction fundamentals with real-world applications, like introduction to cabinetry. Classes include professionally produced videos taught by practicing craftspeople, and supplementary downloads like quizzes, blueprints, and other materials to help you master the skills.


