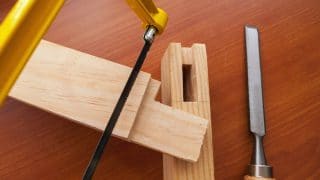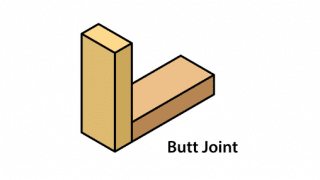
When it comes to versatility for wood joints, the tongue and groove joint might be king of the hill. Made from a dado and two rabbets, this joint is simple and widely used across a range of carpentry and woodworking projects.
What is a tongue and groove joint?
A tongue and groove joint is a type of woodworking joint used to connect two or more pieces of wood together without mechanical fasteners. The woodworker or carpenter first cuts a groove (also called a dado) down the length of an edge of a board. Then, they’ll perform two rabbet cuts along the edge of another board, creating the tongue that fits into the groove. The two pieces then fit edge to edge, with the tongue hiding inside the groove.
Once the tongue is inserted into the groove, they form a strong joint that will remain flat and consistent throughout the seam. In some cases, the installer will drive nails through the tongue and into the substrate (usually a plywood floor or joists). In other cases, such as tabletops or cabinet door joinery, the tongue and groove joint creates a large gluing surface, which helps form a very strong joint.
Types of tongue and groove joints
There are two types of tongue and groove joint: a traditional joint with a tongue cut from a board as described above, or a slip tongue and groove joint. Slip tongue and groove joints utilize a floating tongue (a strip of wood) inserted between two grooved pieces. This joint is most common when changing patterns when installing a hardwood floor, as the groove at the end of the board can register against the groove down the length of another board.
When to use tongue and groove joints
Tongue and groove joints are incredibly versatile, strong, and relatively easy to make. With those points in mind, it’s not hard to imagine how many applications there are for tongue and groove joints.
- Wood Flooring. The most common use of tongue and groove joinery is for wood flooring. The subfloor that stretches across the floor joists, whether it be plywood or individual boards, utilizes tongue and groove joints to make them stable, strong, and flat but also allow for a bit of shifting as the house settles. Hardwood strip flooring installed over top of the subfloor also utilizes tongue and groove joints to keep the individual strips of wood flat and stable.
- Cabinetmaking. Tongue and groove joints are also a staple in cabinetmaking, specifically with frame and panel doors. Cabinetmakers will often cut grooves along the rails (the horizontal framing member) and stiles (the vertical pieces), and then cut tongues at the end of the rails. The groove allows them to slide a panel into the middle of the frame while giving the tongues on the rails the perfect place to slide into. With all that glue area, these doors are incredibly strong.
- Tabletops. Certain tabletops made from individual planks of wood utilize tongue and groove joinery as well. They’re able to create a flat surface while still allowing for some expansion and contraction with changes in the atmosphere.
How to cut tongue and groove joints
The easiest way to cut tongue and groove joints is with a router table and a matching set of router bits. The bit with the blade centered in the middle will cut the groove, while the bit with two blades will cut a tongue.
Tools and material for cutting tongue and groove joints:
- Safety glasses
- Combination square
- Pencil
- Router
- Router table with rip fence
- Tongue and groove router bit set
- Two pieces of wood of the same thickness (let’s assume ¾-inches thick for this guide)
- Scrap wood of the same thickness
Note: The following steps describe how to cut tongue and groove joints down the length of two boards. For cutting tongue and groove joints on the edges of the boards, use a miter gauge and a sacrificial backer.
1. Layout the groove
It’s generally easier to start with a groove and then cut the tongue to fit. Start by laying out the groove on the end of one piece of wood. Generally speaking, you’ll want to divide the thickness into thirds, so use the pencil to mark a guideline ¼-inch in from each side, leaving ¼ inch in the middle for removal. Then use the combination square to mark the depth (usually ¼ to ½-inch deep).
2. Adjust the groove cutting Bit and router fence
Install the groove cutting bit in the router. With the piece of wood you marked as a reference, adjust the height of the router bit so it lands just inside the guideline for the groove. Then, use the depth guideline to adjust the fence in or out to the ideal depth.
3. Cut the groove
Don your safety glasses and turn the router table on. Holding the workpiece flat against the router table and up against the fence, pass the board over the router bit. Once through, remove the piece, flip it over, and pass the grooved side back over the router bit to center the groove.
4. Layout the tongue
Use the combination square to take final measurements from the grooved piece and transfer those measurements to a scrap piece of wood of the same thickness. Be sure to use a sharp pencil so the layout lines are thin and accurate.
5. Adjust the tongue cutting bit and router fence
Install the tongue cutting bit in the router. Use the reference marks on the scrap piece of wood and adjust the height of the bit. Use the depth reference marks to adjust the fence in or out.
Note: In most cases, it’s best to cut the tongue just a bit shorter than the depth of the groove to allow for expansion or glue.
6. Cut the tongue
Throw your safety glasses back on and start the router table. Holding the scrap piece of wood flat against the router table and up against the fence, pass it over the spinning tongue cutting bit. This bit removes twice as much wood as the groove cutting bit so it will take longer; be patient and don’t force it.
7. Test the fit
Once you cut the tongue on the scrap piece of wood, test fit it into the groove to ensure that it’s snug, centered, and creates a flat joint. If not, adjust the height of the bit or depth of the fence, try another past, and test the fit until it’s snug and centered.
8. Cut the final tongue
Once satisfied with the adjustments, pass the workpiece through the router to create the final tongue. You can apply glue to the joint or nail it to a substrate, but either way, this joint will last.
MT Copeland offers video-based online classes that give you a foundation in construction fundamentals with real-world applications, like introduction to cabinetry. Classes include professionally produced videos taught by practicing craftspeople, and supplementary downloads like quizzes, blueprints, and other materials to help you master the skills.


