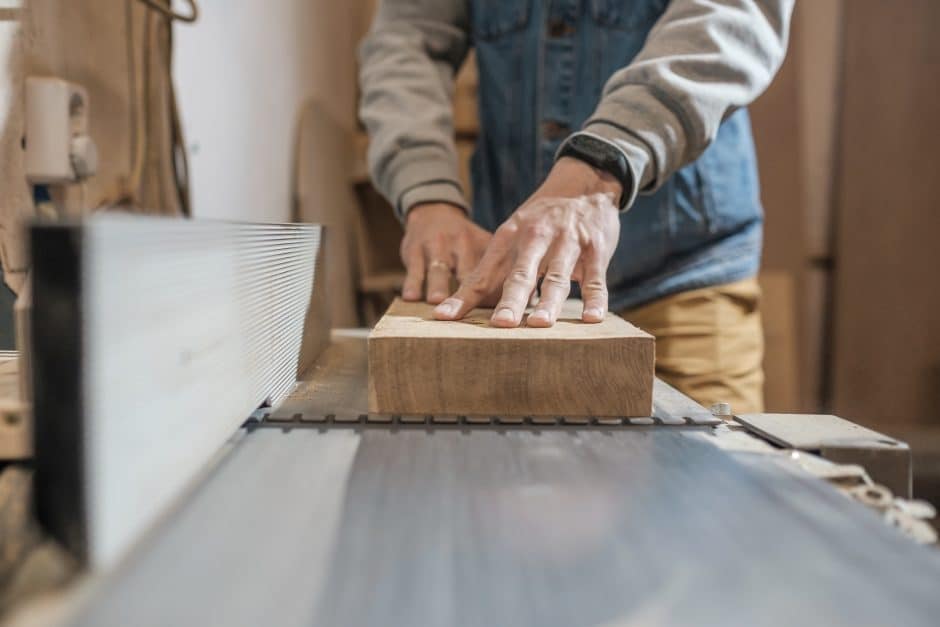
The jointer is considered one of the three essential stock-dressing machines in woodworking, along with the table saw and planer. But what exactly does a jointer do and how does it work? And when do professional woodworkers need to use one?
What is a jointer?
A jointer is a woodworking machine used to flatten, smooth, and square the edges of a lumber board. It corrects material defects, like warping or cupping, and in cabinetry or furniture projects, prepares board edges for gluing and fastening.
Most woodworking operations can be performed mechanically or manually. A jointer is the mechanical version of a hand tool called a jointer plane.
How does it work?
A jointer has four main components; an infeed table, an outfeed table, a fence, and a cutter head.
The infeed table and outfeed table sit coplanar, meaning they’re on the same plane and perfectly flat. The infeed table supports the board as it approaches the cutter head; the outfeed table supports the milled portion of the board.
The height of the infeed table is set according to the thickness of the layer being removed from the board; the surface of the outfeed table is fixed and flush with the height of the cutter head. The jointer fence runs perpendicularly along the edge of both tables.
Lowering the infeed table with the handle adjusts the depth of cut, or amount of material removed. The board is fed along the fence and across the cutter head, creating a flat surface. Several passes may be necessary to remove material defects or flatten a board.
The average depth of cut for most projects is around 1/16 to 1/8 inch, which explains why jointers come in various sizes. A 6-inch jointer is the most common, meaning the cutter head is 6 inches long, making this the maximum board width the machine can handle. The length of the infeed and outfeed tables, known as the bed, also varies; the longer the bed, the larger the reference area, and the longer the boards the jointer can process. As a general rule, a jointer can handle boards up to twice the length of its bed.
What can you do with a jointer?
You can take on several projects with a jointer, such as flattening defective boards or squaring stock.
- Correct material defects: Wood is naturally imperfect; it warps, cups, and twists unpredictably, especially as it dries. Once your stock adjusts to the relative humidity of your shop, you can straighten and flatten defective boards using a jointer.
- Dress boards: The most affordable way to purchase lumber is to buy it rough, meaning you’ll have to mill, or dress, the lumber yourself. A jointer can help bring your boards to dimension by surfacing one or two sides, preparing pieces for a planer. A jointer can also reveal grain direction by unveiling what’s beneath the rough outer layer.
- Square stock: Most woodworking, especially cabinetry and furniture making, requires boards with perfectly square faces and edges. A jointer can deliver a perfect 90-degree angle along the edge of a board, ensuring proper fastening later on. A jointer can also help with other operations including tapering, chamfering, rabbeting, and beveling.
Do you need a jointer for your woodworking project?
Your need for a jointer depends on your type of work. If you buy dressed lumber, or if you’re just getting into woodworking, you probably don’t need a jointer at this point. On the other hand, if you want to save money by purchasing rough lumber, or if your cabinets or furniture projects call for precise dimensions and angles or advanced joinery, a jointer can help make your milling process easier and more accurate.
That being said, a jointer usually isn’t the first piece of machinery you should get for your shop, especially if you can only afford one or two pieces of equipment to start. A table saw or a planer might be a better option.
A jointer is the power tool equivalent of a jointer planer, a type of hand plane. You can always prep and bring lumber to dimension with hand tools, but this approach might be less accurate, and may be more time-intensive and demanding than you’d like.
Choosing between a jointer and planer
Jointers and planers are different, but often used in unison. Most woodworkers would agree you need a jointer and planer to get the most out of your rough lumber. There are also jointer-planer combos on the market.
A jointer can flatten and square a board, but it can’t mill a board to a consistent thickness, nor is it useful for milling a board to precise dimensions. While you can use a jointer to flatten both faces or all four sides of a piece, this usually results in a tapered board, or a board that’s thicker on one end than the other. A jointer can produce flat edges, but it’s not designed to keep opposing sides parallel to each other.
A planer, i.e. a thickness planer, is a thicknesser: It trims a board to a consistent thickness throughout its length, rendering it perfectly flat on both surfaces. Before going into a planer, a board should have one flat side with a square edge—which is where the jointer comes in. Once jointed, the board is then fed through the planer, its flat side against the planer bed. The planer then cuts the rough top side of the board, making the second face parallel to the first.
Using a jointer
Safety tips
A jointer must be precisely tuned to work properly and safely. Every machine is different, so get to know your jointer’s settings and features before using it.
- Wax the surface. Dust off your workspace and ensure the machine is unplugged from power. Buff a small amount of paste wax onto the entire surface of the infeed table, the outfeed table, and the fence, then remove the excess using a dry cloth. This allows your boards to glide smoothly across the machine.
- Adjust the fence. Not every jointer operation requires the entire width of the cutter head. To minimize the risk of injury, move the fence to expose only the width of the cut you’re making. For wider boards, push the fence back for more room. To produce perfectly square edges, make sure your fence is perfectly square using a combination square. This can usually be done with a few turns of a set screw on the backside of the machine.
- Be smart, be safe. Push the cutter head guard into place to prevent slip injuries. To keep your hands clear from the blades, consider using push blocks to guide your board. Don’t mill pieces shorter than 12 inches, and don’t overreach when milling longer boards. Always wear eye and ear protection.
Tips for better results
As with any piece of woodworking equipment, proper technique comes with practice. Here are a few pointers to set you off on the right foot:
- Set an appropriate depth of cut. Avoid wasting stock or overcutting by starting with a shallow depth of cut. Run a test pass, then readjust accordingly. For general use, set your machine to 1/32 inch, which is usually enough to remove saw marks on a ripped edge. A rough or badly warped board might require a deeper cut. The maximum depth depends on the width and density of the stock. Heavy milling might call for 1/8 inch, which is normally the deepest you want to go.
- Feed your board according to its defects. Sight down the edge of your piece to reveal bows. Cupping is usually evident at a glance. For stability when feeding, place your board with the cup or bow facing downward, making sure the piece has at least two points of contact as it passes across the tables. For a twisted board, maintain consistent pressure on one side to avoid rocking the piece as it runs across the cutter head.
- Consider feed pressure. Joint the face of the board first. Lay the board on the infeed table, push it firmly against both the table and the fence, and slowly run it across the cutter head. Avoid applying excessive downward pressure, especially when milling thin stock; press down just enough to keep the cutter head from pushing the piece upward.
As you cross from the infeed table to the outfeed table, maintain consistent pressure across the length of the board without overreaching. Don’t move pressure from one side to the other, and don’t adjust your pressure with the board’s dips and humps. Keep an eye on the space between the board and the table, as well as the board and the fence.
- Watch feed speed. Feed speed depends on the density of your stock, the width of your piece, and the depth of your cut. Moving too quickly creates a scalloped surface. To be sure, run a test pass or two, inspect the results, and adjust accordingly.
- Pay attention to grain direction. Avoid grain tear-out by orienting your board so the cutter head rotates in the same direction as the slope of the grain. In other words, joint “downhill.” Wood grain doesn’t always run neatly in a single direction; favor what cuts mostly along the slope. If you aren’t sure, making a few light passes can give you a better idea.
- Cut boards into smaller pieces first. This makes the jointing process more manageable and produces more even results. If possible, subdivide your boards into pieces with slightly oversized length, and/or rip them to rough width. For safety, use push blocks when milling boards shorter than the length of the infeed table.
- Watch for staples or small nails. These may be tacked onto the ends of the edges of rough lumber, and should be removed before milling. Never run staples or nails through the cutter head. Not only can they damage the blades, they can create obvious imperfections on the surface of your boards.
- Square up the jointed edge. Once the board’s face is milled, turn the piece 90 degrees. With the newly milled face firmly against the fence, joint the adjacent edge, making sure your board stays in precise contact with the fence throughout the operation. With the edge now square with the face, your board is ready for the planer.
MT Copeland offers video-based online classes that give you a foundation in construction fundamentals with real-world applications, like how to build a freestanding deck. Classes include professionally produced videos taught by practicing craftspeople, and supplementary downloads like quizzes, blueprints, and other materials to help you master the skills.

